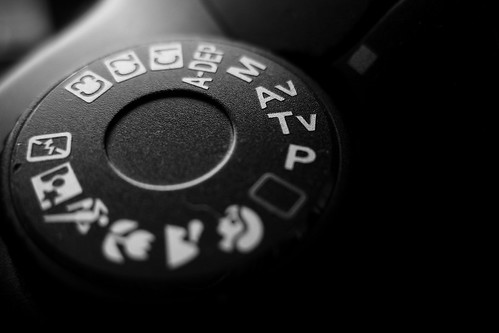
1. Set the Mode Dial on the top left of the camera to 'M'.
2. Compose your shot and choose a F number (aperture). If it is a landscape or still photo depending on whether you want the focus on the foreground or the background or on both. Choose a small F number for portrait shots or a big F number if you want everything in the picture to be in focus. Turn the Quick Control Dial on the back of your DSLR to set the aperture. This is the outer dial surrounding the 'SET' button as shown below :

3. Focus the subject by placing the AF point in the viewfinder on the subject and pressing the shutter button halfway. You will see the exposure scale at the bottom of the viewfinder and on the LCD panel at the top of your DSLR. This is a scale with -1, -2 and -3 to the left and +1, +2 and +3 to the right of a central black mark. Below the scale will be a moving exposure level mark indicating if the image is under (to the left) or overexposed (to the right).
4. Set the exposure by moving the top (or Main) dial just behind the shutter button in the direction indicated by the exposure level mark. Keep rotating the top dial to set the shutter speed until the mark reaches the center of the scale. In the picture below you can see the arrow pointing to the left of the -3 mark.

Rotate the Top Dial just behind the shutter button :

in the direction of the arrow till the mark moves back to the center :

5. Depress the shutter button fully to click your picture.
Check your picture on the LCD monitor of the camera. If overexposed take the same shot but rotate the top dial till the exposure level mark is at -1 or -2. Then click again to get an underexposed image. If the picture is too dark then rotate top dial till the mark is on +1 or +2 or anywhere on the plus side of the scale.
Happy shooting!
No comments:
Post a Comment