A photograph is a static two dimensional image. To give the impression of the speed of a moving object the background can be made into a streaky blur by panning the camera.
Another method of showing speed is by decreasing the shutter speed. The shutter remains open for longer and any body in motion streaks itself across the image :
The above picture shows a train moving at speed round a slight curve. It was taken in Manual mode with Aperture F/16 and Shutter Speed of 0.6. You can also create such an image by following these steps :
1. Use a tripod as slow shutter speed may result in the whole image being blurred due to camera shake.
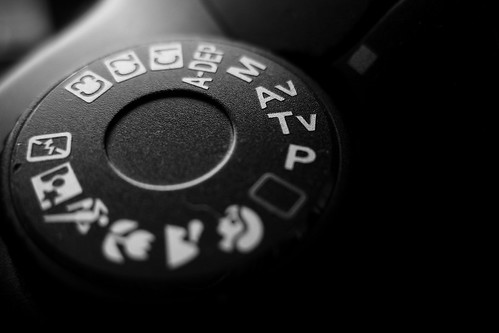
2. Change Mode Dial to Tv or Shutter Priority.
3. Depending on the speed of the moving object experiment by selecting a slow speed and click the shutter.
4. Try shooting in Manual Mode. First set the aperture to a large F number if the scene is brightly lit. Then press the shutter button halfway and look at the exposure meter scale at the bottom of the viewfinder. Rotate the top dial just behind the shutter button till the exposure mark below the scale is at zero. Then take the picture.
5. Selecting a large F number makes the aperture smaller and then shutter speed has to be slower to correctly expose the picture. The slow shutter speed results in the motion blur.
Formulas in Photography. Tips and Tricks in Photography. Digital Photography. Adventures and photoshoots. DSLRs. digital cameras. Canon EOS 60D.
Showing posts with label manual mode. Show all posts
Thursday, August 23, 2012
Wednesday, August 22, 2012
Shooting in Manual Mode made easy.
To shoot in manual mode follow these steps :
1. Set the Mode Dial on the top left of the camera to 'M'.

2. Compose your shot and choose a F number (aperture). If it is a landscape or still photo depending on whether you want the focus on the foreground or the background or on both. Choose a small F number for portrait shots or a big F number if you want everything in the picture to be in focus. Turn the Quick Control Dial on the back of your DSLR to set the aperture. This is the outer dial surrounding the 'SET' button as shown below :
3. Focus the subject by placing the AF point in the viewfinder on the subject and pressing the shutter button halfway. You will see the exposure scale at the bottom of the viewfinder and on the LCD panel at the top of your DSLR. This is a scale with -1, -2 and -3 to the left and +1, +2 and +3 to the right of a central black mark. Below the scale will be a moving exposure level mark indicating if the image is under (to the left) or overexposed (to the right).
4. Set the exposure by moving the top (or Main) dial just behind the shutter button in the direction indicated by the exposure level mark. Keep rotating the top dial to set the shutter speed until the mark reaches the center of the scale. In the picture below you can see the arrow pointing to the left of the -3 mark.

Rotate the Top Dial just behind the shutter button :
in the direction of the arrow till the mark moves back to the center :

5. Depress the shutter button fully to click your picture.
Check your picture on the LCD monitor of the camera. If overexposed take the same shot but rotate the top dial till the exposure level mark is at -1 or -2. Then click again to get an underexposed image. If the picture is too dark then rotate top dial till the mark is on +1 or +2 or anywhere on the plus side of the scale.
Happy shooting!
1. Set the Mode Dial on the top left of the camera to 'M'.

2. Compose your shot and choose a F number (aperture). If it is a landscape or still photo depending on whether you want the focus on the foreground or the background or on both. Choose a small F number for portrait shots or a big F number if you want everything in the picture to be in focus. Turn the Quick Control Dial on the back of your DSLR to set the aperture. This is the outer dial surrounding the 'SET' button as shown below :

3. Focus the subject by placing the AF point in the viewfinder on the subject and pressing the shutter button halfway. You will see the exposure scale at the bottom of the viewfinder and on the LCD panel at the top of your DSLR. This is a scale with -1, -2 and -3 to the left and +1, +2 and +3 to the right of a central black mark. Below the scale will be a moving exposure level mark indicating if the image is under (to the left) or overexposed (to the right).
4. Set the exposure by moving the top (or Main) dial just behind the shutter button in the direction indicated by the exposure level mark. Keep rotating the top dial to set the shutter speed until the mark reaches the center of the scale. In the picture below you can see the arrow pointing to the left of the -3 mark.

Rotate the Top Dial just behind the shutter button :

in the direction of the arrow till the mark moves back to the center :

5. Depress the shutter button fully to click your picture.
Check your picture on the LCD monitor of the camera. If overexposed take the same shot but rotate the top dial till the exposure level mark is at -1 or -2. Then click again to get an underexposed image. If the picture is too dark then rotate top dial till the mark is on +1 or +2 or anywhere on the plus side of the scale.
Happy shooting!
Subscribe to:
Posts (Atom)