Monday, September 11, 2017

The Making of 'Pushpavrishti' aka 'God is in the details!'

I did not know it then, but 'Pushpavrishti' was to be four years in the making!

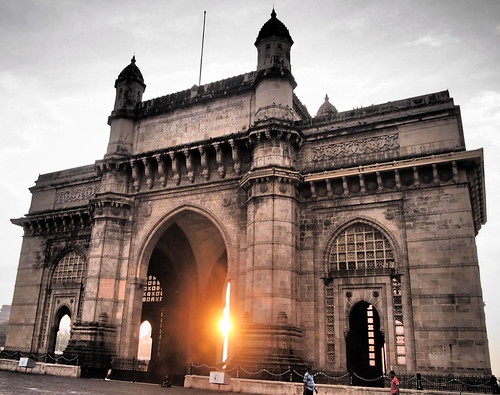
I first came to Shroff building for Anantchaturdashi in 2013.  Shroff building stands at a unique confluence of roads.  The Lalbaug flyover sweeps majestically past it.  The ganeshas appear as if by magic from under the flyover and as they pass Shroff building they are showered with petals, flowers and vermillion powder from a contraption in the sky.

The Ganesha festival symbolises man's life on earth.  Ganesha begins his own short life as a germ of an idea in a murtikar's brain.  The murti is then 'created', brought home, made alive by pooja and after a short stay the 'body' is immersed in the sea.  Thus symbolising our short stay on earth.

Shroff building does not have it's own Ganapathy but celebrates all the Ganapathys on their way to the sea by this unique shower of flowers as if from the heavens.

On the day of visarjan the roads are thrown open to the madding crowd which accompanies each Ganesha.  The photographer has to negotiate with and through this crowd to get a good vantage point from where he/she can click pictures of this chaotic order and it's progenitor - the Ganesha.

Humanity had the misfortune of inventing guns first and the camera second.  Much beauty would have been preserved had it been the other way around.  Because guns were invented first, photography inherited all the jargon of shooting without the associated violence.

As the great Ansel Adams said, “You don’t take a photograph, you make it.”  It took me four years to seek out and make this photo at the heart of Lalbaug.

The first step in making a picture is selecting the perfect vantage point.  The Merriam-Webster dictionary defines a vantage point as a place or position affording a good view of something.

At Shroff building the perfect vantage point for clicking a picture of the pushpavrishti is NOT Shroff building.  It is instead a point directly across the road in front of it, about ten meters ahead of it, towards Chinchpokli bridge.  My first two years were spent in negotiating the crowd and searching for the perfect vantage point.

The second step in clicking a picture is having the perfect gear for the vision in your mind.  For two years i had been clicking the same spectacle at Lalbaug and ennui had set in.  The time had come, I thought, to drill down into the spectacle.  What drew lakhs of devotees year after year to the same place to witness the same pushpavrishti?

After 9 days of feteing and feasting the Lord the devotees gather to gift Him a suitable sendoff - a shower of coloured, scented petals drifting down gossamer like on his head and soothingly sliding down His bare shoulders.  Yes, this is not a shower of whole flowers, but a shower of individual petals, lovingly teased out beforehand.  This was then the atom in the universe of Lalbaug, the petal in the crowd.  I wanted to capture this individual petal floating down onto the Lord and sliding down His shoulders.

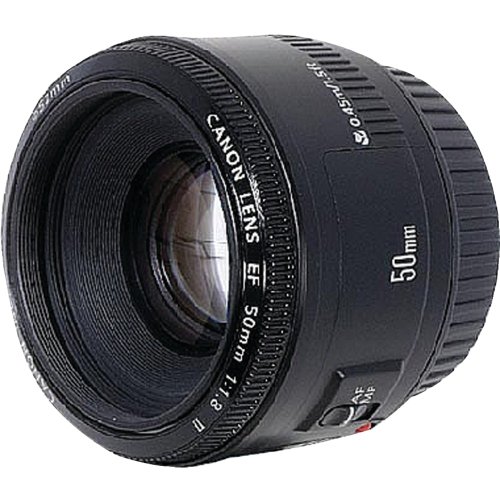
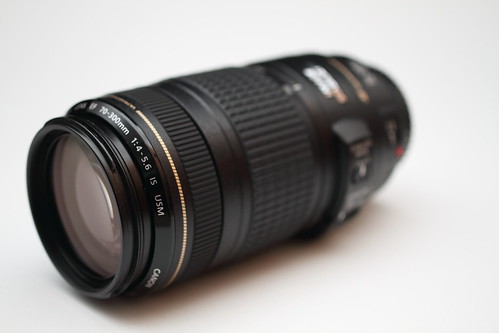
Robert Capa once said, “If your pictures aren’t good enough, you’re not close enough.”  To capture an individual petal i either had to come closer to the Lord, an impossibility in the milling maddening crowd, or click Him from a safer distance zooming in with a telephoto lens.  I chose the latter so as not to be shaken by the crowd during the shoot.

By the third year i had assembled my perfect gear as per my modest serious hobbyist's budget and was all set to click when the heavens opened up and it rained all through the day!

The third step in clicking a picture is to balance your aperture, shutter speed and ISO settings to get the picture as close to the vision in your mind as possible, while ensuring the correct exposure.

Anantchaturdashi 2017 was a bright sunny day and i set out with high hopes of clicking a fastest shutter speed picture.  In order to freeze a falling petal or flower one needs a very fast shutter speed which in turn needs very bright ambient light.

To get individual petals to be seen it was necessary to zoom in at 600mm.  Zooming in at 600mm causes the depth of field to become wafer thin.  So one has to decrease the aperture to increase the depth of field.

If the ambient light is low one can achieve a fast shutter speed by jacking up the ISO, but this causes noise in the picture and hence is not desirable.  So the ISO was jacked up to maximum permissible level of 1600 as after that the noise would have come through.

Morever since the Ganeshas are about 5-6 feet broad one has to decrease the aperture to achieve a sufficient depth of field to get every petal pin sharp at that zoomed in focal length.  Decreasing the aperture means decreasing the amount of light let into the camera.  So having very bright ambient light helps.  After experimentation I settled on an aperture of F/10.

The fourth step was to frame the picture according to the vision in mind.  Since i had decided to use a zoom lens due to budgetary restrictions and wanted to capture the individual petal the decision was easy.

I decided to zoom in at maximum focal length to get a head and shoulders with trunk, portrait of the Lord.  To capture the falling petals I kept the camera on a high speed continuous shooting mode.  Zooming in at max allowed me to exclude all other distractions and focus only on the Lord and the petals.

That is how I captured the petal in the crowd, the atom of that Lalbag universe, as it floated down onto the Lord.

Monday, September 3, 2012

Tips on Photography Workshops for beginners.

Most photography workshops consist of two parts :

  1. A field trip to take pictures and
  2. A classroom session to discuss photography.
These are tips on the field trips of photography workshops for those who have just begun photography :

  • RESEARCH :  The first thing to do is to research the theme of the workshop if any.  Look it up in Google, and search for pictures on the same theme on online photo storage sites.  This is essential because the approach to  photography workshops differs whether it is a macro photography workshop or a fashion photoshoot or a light painting workshop.
  • HARDWARE  :  Collect your hardware according to the theme of the workshop.  For a wildlife photo-shoot a telephoto zoom lens would be essential while for a landscape workshop a wide angle lens would be indispensable.
  • RECONNOITER :  Look up the location in Google maps and the weather on the day of the shoot.  If possible visit the location a day earlier and become familiar with the lighting as well as the people who live there.  Wear same clothes as the locals do to blend into the landscape and become inconspicuous.
  • MENTOR : Taking along a senior photographer as a mentor is always advisable for their wonderful advice on every aspect of photography.
  • PRE-SHOOT CHECKLIST : Make sure you have every item on your preshoot checklist
  • PAUSE before you start shooting and take a look around you. Let the locals get used to you with a camera so that you can blend seamlessly into the environment.  This is so that later you can get shoot  candid shots like this one :


  • Candid jogger

  • PROGRAM MODE : Switch on your camera and change Mode Dial to 'P' or Program AE (AutoExposure) Mode. This will put your camera in point-and-shoot mode where the shutter speed and exposure will be set automatically.  You will not lose precious seconds in adjusting exposure settings and lose that fleeting candid moment.
  • MANUAL MODE :  Having composed a photo change the Mode Dial to "M' or Manual Mode and take the picture manually setting the exposure.  After clicking the picture change the Mode Dial back to 'P' so as not to miss your next candid picture.
  • SHUTTER-PRIORITY AE : To take a photograph of a moving object switch Mode Dial to "Tv" and set the shutter speed and click the picture. Immediately after clicking the picture change the Mode Dial back to 'P' so as not to miss your next candid picture.
  • APERTURE-PRIORITY AE : To take a landscape picture change the Mode Dial to 'Av' and set your F number depending on whether you want a small depth of field (small F number) or a large depth of field (large F number).  Again immediately after clicking the picture change the Mode Dial back to 'P' so as not to miss your next candid picture.
  • LEADING LINES :  Look for leading lines which 'lead' the viewers eyes into the picture :


  • LENS CHANGE : If you want to take a portrait shot switch your lens to one with a large aperture like the one shown below :
    ★ Canon EF 50mm f1.8 II Camera Lens 
    Choose the correct lens for the picture you have in mind.  Use a zoom telephoto for wildlife shots :

    70 300 Canon


  • TRIPOD : Use a tripod in low light conditions or during macro photography to prevent camera shake.
  • ISO :  Increase the ISO setting in low light conditions to get a faster shutter speed and hence prevent camera shake from blurring the picture.  Do not increase the ISO to maximum or you will get 'noise' on your picture.
  • DEPTH OF FIELD :  Telephoto, Macro and F1.8-2.8 lenses give a low depth of field while wide angle lenses and larger F numbers have a wide depth of field.  Use the depth of field preview button in front of the camera to see actual DOF before clicking.
  • WHITE BALANCE :  Check your white balance setting before every shot especially on a cloudy day when the sun peeks out every now and then too spoil your shot.
  • PHOTO SHOOT THEME :  While clicking pictures as per the theme of the shoot feel free to click the beautiful butterfly which flits by.  Do not be constrained too much by the theme of the workshop.


If you have any tips of your own please add them in the comments. Happy Clicking!

Wednesday, August 29, 2012

Wide Angle Fun!

Wide angle lenses have a short focal length and an increased depth of field.  They are called wide angle as they cover a large area in their snapshots.  Hence they are used to shoot landscapes.  Here is the wide angle lens I use :

Sigma 8-16mm f/4.5-5.6 DC HSM

Here is a wide angle photo of fishermen packing their nets after a fishing trip :


Notice the vista of the beach in the background. With a wide angle lens objects in the foreground appear huge :


The greater depth of field seen with a wide angle lens can be further accentuated by using a small aperture at a large F number. The small aperture may require you to use a tripod in low light conditions as a slow shutter speed will result.

A wide angle lens enables you to capture a whole building :


Waiting for Sawaari!

or bring out the beauty of large skies and cloud formations :

Untitled

Saturday, August 25, 2012

Waterfalls ~ Capturing the Silk.

Capturing water in  motion gives a wonderful silky effect :

IMG_6973w

To get the above effect use a slow shutter speed. There are other tricks you will have to use as well :

  1. Use a tripod to prevent camera shake during the slow shutter speed.
  2. Use a dark ND8 Filter to increase shutter time.


  3. ND8 Filter

  4. Set the Drive Mode to "2 sec self timer" to prevent camera shake due to pressing the  shutter button .
  5. Lock up the mirror to prevent camera vibration. Change Custom Function III - 5 to 'Enable'.
  6. Change Mode Dial to Tv or Shutter Priority.
  7. Set shutter speed to around 1/4 sec. Experiment with slow speed settings.
  8. Press shutter button halfway and check exposure.
  9. Press shutter button completely to swing up the mirror.
  10. Press shutter button completely again to take the picture and then the mirror will go down.


IMG_7023w

Thursday, August 23, 2012

Capturing Motion...

A photograph is a static  two dimensional image. To give the impression of the speed of a moving object the background can be made into a streaky blur by panning the camera.

Another method of showing speed is by decreasing the shutter speed. The shutter remains open for longer and any body in motion streaks itself across the image :


The above picture shows a train moving at speed round a slight curve. It was taken in Manual mode with Aperture F/16 and Shutter Speed of 0.6.  You can also create such an image by following these steps :

1.  Use a tripod as slow shutter speed may result in the whole image being blurred due to camera shake.

2.  Change Mode Dial to Tv or Shutter Priority.

3.  Depending on the speed of the moving object experiment by selecting a slow speed and click the shutter.

4.  Try shooting in Manual Mode. First set the aperture to a large F number if the scene is brightly lit.  Then press the shutter button halfway and look at the exposure meter scale at the bottom of the viewfinder.  Rotate the top dial just behind the shutter button till the exposure mark below the scale is at zero. Then take the picture.

5.  Selecting a large F number makes the aperture smaller and then shutter speed has to be slower to correctly expose the picture.  The slow shutter speed results in the motion blur.

Wednesday, August 22, 2012

Best Time for Clicking Pictures.

The best times for clicking pictures are in the early morning, the first hour around sunrise :

PB274781

and the last hour around sunset :

Starting young!

The hours around sunrise and sunset are known as the Golden Hours of Photography.  Overcast skies without rain also provide the perfect diffuse light for taking pictures :

IMG_4534w

A natural softbox providing just enough light is the result of an overcast sky. Shooting in the afternoon can result in overexposed shots from too much light as seen below:

<untitled> 280

Silhouette Photography.

A silhouette is an outline of an object or person :

Come, hold my hand!

Lit from the back all details of the subject are in shadow.

To get good silhouette pictures :

  • Shoot facing the light with your subject in the middle. 
  • Choose Spot or Partial Metering Mode at the bottom of Quick Control Screen. 
  • Turn off the flash as it will illuminate the dark areas which we want to remain black. 
  • Turn Mode Dial to Av or Aperture Priority Mode and choose a large F number.
  • Press shutter button halfway and turn the Quick Control Dial till the exposure meter mark is in the negative area.This will darken the silhouette more.


Lovers sunset!